How to Print Drawing in Autocad
Output a drawing layout to a printer, a plotter, or a file. Save and restore the printer settings for each layout.
Originally, people printed text from printers and plotted drawings from plotters. Now, you can do both with either. So this guide will also use the terms print and plot interchangeably as everyone else does.
The command to output a drawing is PLOT and you can access it from the Quick Access toolbar.

To control whether all of the options in the Plot dialog box are hidden or displayed, click the More Options button.

When all of the options are displayed, there are a lot of settings and options available for your use.

For convenience, you can save and restore collections of these settings by name. These are called page setups. With page setups you can store the settings that you need for different printers, printing in gray scales, creating a PDF file from your drawing, and so on.
Create a Page Setup
To open the Page Setup Manager, right-click on the Model tab or a layout tab and choose Page Setup Manager. The command is PAGESETUP.
Each layout tab in your drawing can have an associated page setup. This is convenient when you use more than one output device or format, or if you have several layouts with different sheet sizes in the same drawing.

To create a new page setup, click New and enter the name of the new page setup. The Page Setup dialog box that displays next looks like the Plot dialog box. Choose all the options and settings that you want to save.
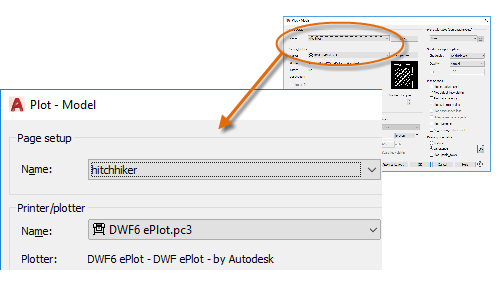
When you are ready to plot, you simply specify the name of the page setup in the Plot dialog box, and all your plot settings will be restored. In the following illustration, the Plot dialog box is set to use the Hitchhiker page setup, which will output a DWF (Design Web Format) file rather than print to a plotter.
Tip: You can save page setups in your drawing template files, or you can import them from other drawing files.
Output to a PDF File
The following example shows you how to create a page setup for creating PDF files.
From the Printer/plotter drop-down list, choose AutoCAD PDF (General Documentation).pc3:

Next, choose the size and scale options that you want to use:
- Paper Size. The orientation (portrait or landscape) is built into the choices in the drop-down list.
- Plot Area. You can clip the area to be plotted with these options, but usually you plot everything.
- Plot Offset. This setting changes based on your printer, plotter, or other output. Try centering the plot or adjusting the origin, but remember that printers and plotters have a built-in margin around the edges.
- Plot Scale. Choose your plot scale from the drop-down list. A scale such as 1/4" = 1'-0" is meant for printing to scale from the Model tab. On a layout tab, you normally print at a 1:1 scale.
The plot style table provides information about processing colors. Colors that look good on your monitor might not be suitable for a PDF file or for printing. For example, you might want to create a drawing in color, but create monochrome output. Here is how you specify monochrome output:

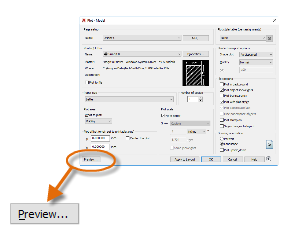
Tip: Always double-check your settings with the Preview option.
The resulting Preview window includes a toolbar with several controls, including Plot and Close Preview Window.

After you are satisfied with your plot settings, save them to a page setup with a descriptive name such as "PDF-monochrome." Then, whenever you want to output to a PDF file, all that you need to do is click Print, choose the PDF-monochrome page setup, and click OK.
Recommendations for Sharing and Remote Access
- If you want to share a static image of your drawing, you can export a PDF file from a drawing (PLOT command).
- If you want to include additional data from your drawing, you can export a DWF (Design Web Format) file from a drawing (PLOT command).
- If you want to share designs with clients and colleagues within or outside your organization without releasing your drawing files, you can use the Shared Views feature (SHAREDVIEWS command).
- If you want to access a drawing from a different location or device, you can use the Save To AutoCAD Web & Mobile feature (SAVETOWEBMOBILE, OPENFROMWEBMOBILE commands).
Final Thoughts
Congratulations, you've done it! You've learned the basics of AutoCAD with the minimum set of commands. From here, simply practice what you've learned, review the chapters as needed, and expand your collection of commands. For additional information, you can
- Study the topic links to the Help system
- View videos from various AutoCAD learning websites
- Ask questions and receive tips on AutoCAD discussion forums (https://forums.autodesk.com/)
- Browse through blog posts on the Autodesk and AutoCAD-related websites (https://www.autodesk.com/blogs)
- Get help from local support providers or experts right away if you encounter any difficulties
Best wishes from Autodesk for high productivity and success!
Source: https://knowledge.autodesk.com/support/autocad/learn-explore/caas/CloudHelp/cloudhelp/2020/ENU/AutoCAD-Core/files/GUID-F5A39DF2-41FE-4341-BF26-AC620B3905F3-htm.html
0 Response to "How to Print Drawing in Autocad"
Post a Comment